Diabetic Blood Test Kit Guide: Types, Use and Accuracy
Learn how a diabetic blood test kit works, how to use it safely, why results can mislead, and when to see a GP for advice in the UK. Plain English, practical.
What if your blood glucose meter gives a clear number, but the number is wrong?
A diabetic blood test kit can help you monitor blood sugar or collect a sample for laboratory testing. How much you can trust the result depends on three things: which test it is, how carefully you use it, and what your body is telling you at the same time. No kit replaces a clinical assessment.
Matching strips to your meter matters more than screen size. So does storage. Heat and damp can spoil strips, and a meter kept in a warm kitchen drawer may hand you a figure that looks precise and means very little. Keep strips in date, and check the code if your meter asks for one.
This guide explains the main testing routes, safe finger-prick technique and the difference between home targets and diagnostic tests. It also helps you decide when to repeat a reading, when to wash your hands and start again, and when to seek help instead.
Five key takeaways
- Choose the right test: a glucose reading and an HbA1c result answer different questions.
- Match your treatment: not everyone with type 2 diabetes needs routine finger-prick checks.
- Protect the sample: clean, dry hands and in-date strips matter.
- Question odd results: symptoms count, even when the screen looks reassuring.
- Plan your response: agree targets and next steps with your diabetes team.
Which diabetic blood test kit measures what
A diabetic blood test kit is a home or clinic tool that measures glucose, or collects blood for a marker such as HbA1c. The name covers several different tools, and they do not answer the same question.
HbA1c works like a monthly bank statement. A finger-prick reading is the balance right now. A finger-prick meter checks current blood glucose. HbA1c reflects your average blood glucose over the previous few months, rather than what happened after today's lunch.
Diabetic blood test kit types and what each measures
| Kit type | Sample | What it measures | Typical use |
|---|---|---|---|
| Finger-prick glucose meter | Capillary drop from fingertip | Blood glucose now, in mmol/L | Daily checks for insulin users |
| Home self-collection device, such as Tasso | Capillary sample collected at home and sent to a lab | Lab-measured result for the test ordered | When a finger-prick sample is too small or hard to obtain |
| Venous lab test via GP or clinic | Blood drawn from a vein | Lab glucose and HbA1c | Diagnosis and confirmation |
| Continuous glucose monitor | Sensor reading fluid under the skin | Glucose every few minutes | Ongoing monitoring, with finger-prick as backup |
A continuous glucose monitor, or CGM, doesn't draw repeated blood samples. Its sensor measures glucose in fluid beneath the skin. Sensor glucose and finger-prick blood glucose aren't exactly the same measurement.
A sensor can show patterns that a single spot check misses. It does not remove the need for a backup plan. If you use a sensor, the manufacturer's instructions for your model and your diabetes team can answer questions about sensor monitoring; the FreeStyle Libre 2 Plus sensor information is one example of model-specific guidance.
Match the tool to the question
If you use insulin, you need timely information that supports your agreed treatment plan. If you're worried that you might have diabetes, you need a clinical assessment and the right laboratory test, rather than a meter bought online.
Courier Pharmacy offers home blood test kits, including a Tasso self-collection option for people who struggle to collect enough blood. The sample goes to a laboratory, so this route isn't an instant glucose check. Courier Pharmacy's home kits are designed for home use, with clear instructions and everything needed for the process. The Blood Sugar Test measures longer-term glucose control, so check the test name before ordering.
Don't assume every home collection kit measures the same thing. Distinguish a blood collection device from a glucose meter. The useful question is which kit fits your treatment, and how far you can trust the number it gives you.
Choosing a kit and testing route for your situation
Start with the details that make a result usable, rather than optional screen features.
- Calibration: check whether the system uses whole-blood or plasma calibration. The MHRA blood glucose meter guidance explains that plasma-calibrated results are approximately 12% higher than whole-blood results, so reference ranges must match the system. [1]
- Sample size: choose a meter whose blood-drop requirement you can manage. Too little blood may prevent a reliable result.
- Sampling site: only use the forearm if the specific meter and strips allow it. Don't assume all sampling sites give interchangeable results.
- Units and strips: choose a UK system displaying mmol/L, with readily available compatible strips. Never substitute another maker's strips.
- Instruction: ask your clinician when to test, what your targets are and what action each result should prompt.
Which testing route fits each situation
| Situation | Usually best | Why |
|---|---|---|
| Type 1 or insulin-treated diabetes | Finger-prick meter for dosing and hypo checks | Readings guide dose decisions and spot hypos |
| Type 2 on metformin, not on insulin | Lab HbA1c, with routine finger-prick only if a clinician advises it | Metformin rarely causes hypos and HbA1c shows longer-term control |
| Suspected diagnosis or raised HbA1c | Venous lab test arranged through a GP | A home meter cannot confirm a diagnosis |
| Unexplained symptoms or feeling unwell | Check a reading now if available and seek medical advice if high or unwell | Symptoms may need prompt review |
| Interest in continuous data | Discuss continuous glucose monitoring with a clinician | Monitoring suits some people, but sensors have trade-offs |
Do all people with type 2 diabetes need a meter? No. The testing plan should reflect medicines, symptoms and what you would do with the result.
A busy parent's decision
Say you're a busy parent taking metformin for type 2 diabetes. You wonder whether daily checks would help, but another task feels daunting.
The NENC self-monitoring guidance explains that routine finger-prick monitoring may not be needed when treatment doesn't usually cause low glucose. HbA1c often gives the more useful longer-term picture. [2]
Your GP may still suggest checks during illness, after a medicine change or when you suspect low glucose. Ask what the checks will help you decide, rather than testing without a clear purpose.
Pharmacist's tip: Before buying a meter, ask, “What would I do differently after seeing this result?” If the answer isn't clear, agree a plan first.
When a sensor may help
The NHS-linked My Diabetes My Way monitoring guide describes a UK trial in which CGM reduced HbA1c by 9 mmol/mol (0.8%) over 16 weeks, compared with 2 mmol/mol (0.1%) with finger-prick testing. [3]
That finding isn't a promise for every user. Sensor discomfort, cost, eligibility, privacy and anxiety from frequent checking still matter. Ask about sensor lag and when a finger-prick check is needed; the Dexcom ONE sensor information can support that discussion.
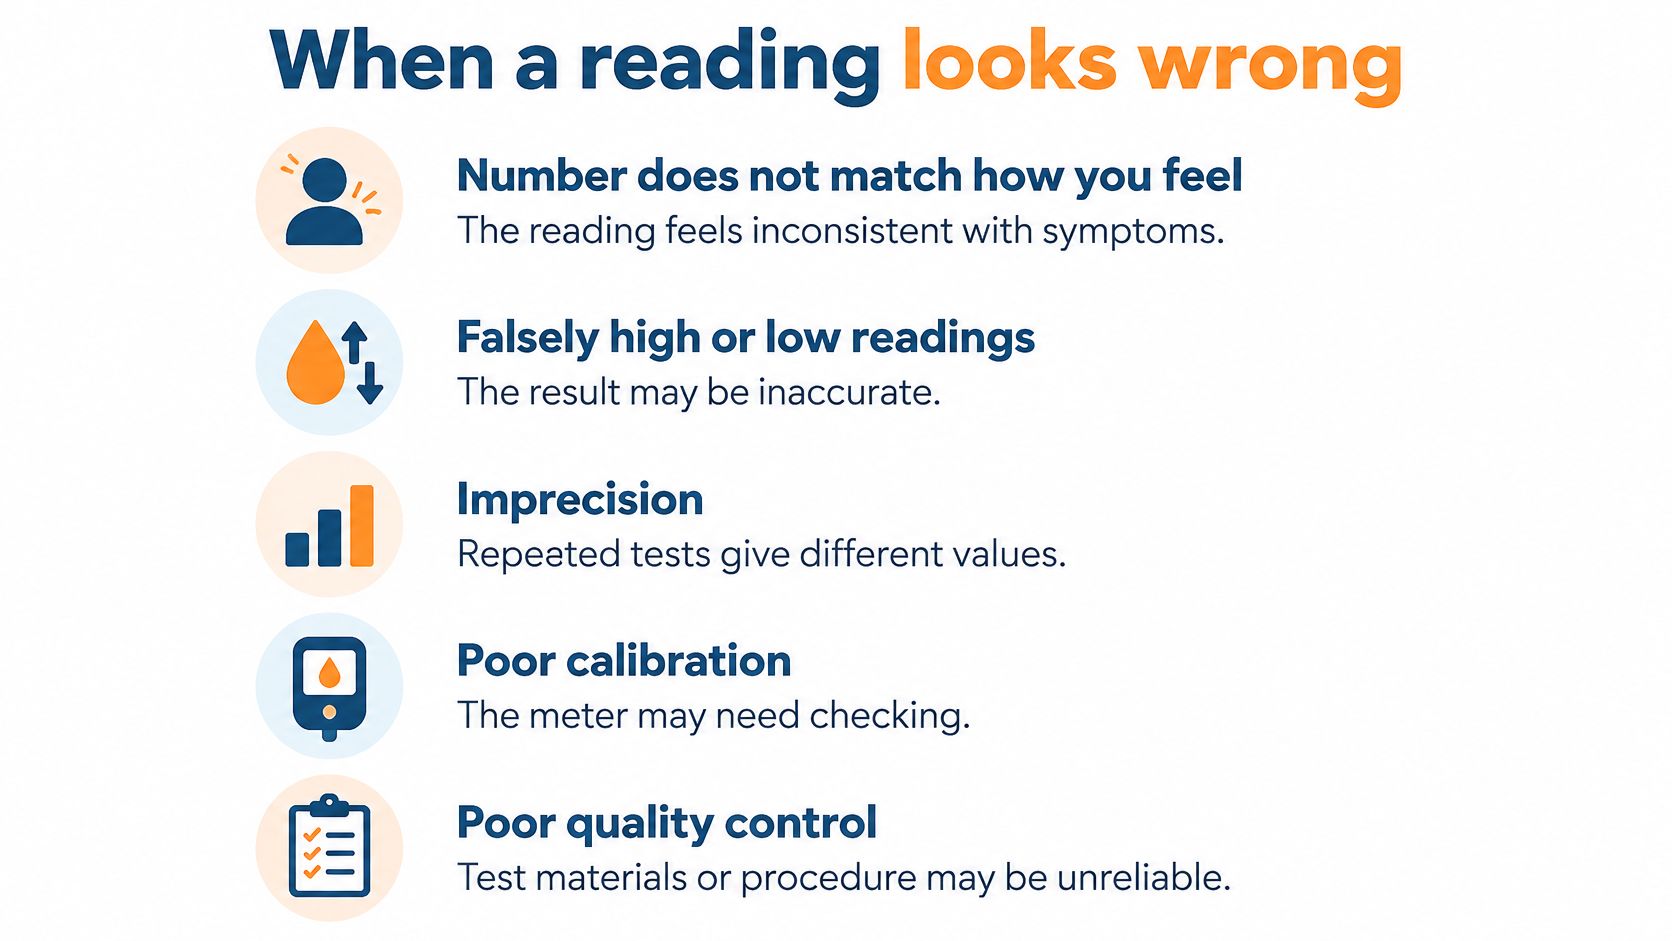
The MHRA's glucose monitor vigilance guidance identifies false readings, poor calibration and quality-control failures as performance concerns. A compliant device still needs sound handling and interpretation. [4]
Home blood tests can support diagnosis but don't replace a clinical assessment. Unexpected or abnormal meter results may need a venous laboratory test through your GP or clinic.
Getting a kit and follow-up support
Ask your GP or diabetes team whether they can supply a meter, strips and lancets. Tell them if you struggle with small buttons, poor eyesight or obtaining a blood drop.
If you buy privately, check the exact strip name and meter model before ordering. Similar packaging doesn't mean the strips fit. Also consider whether you can keep obtaining the right strips, not just the initial kit.
Plan collection and storage
A laboratory collection kit needs a different routine from a meter. Check whether fasting applies, how to label the sample and how to return it. Our home blood test information helps explain that route.
For ongoing glucose checks, keep a simple record:
- Timing: note when you tested and its relation to meals.
- Context: record illness, exercise, symptoms or medicine changes.
- Supplies: check expiry dates and keep strips sealed in their original container.
Keep your testing equipment together, but don't transfer loose strips into a pill box. Their original packaging protects them from moisture.
Pharmacist's tip: Bring the actual meter and strip container to an appointment. A photo of a result won't show a storage problem or mismatched supplies.
Arrange safe disposal and review
Put used lancets and strips in a sharps bin, following local collection rules. Don't place loose testing sharps in household rubbish. Ask your council or pharmacy how to arrange disposal locally.
Take your readings, meter details and medicine list to follow-up appointments. A pharmacist can check your technique and storage routine if you're unsure.
Share results with your GP so treatment decisions reflect the full picture. A useful record explains what was happening around a reading, rather than presenting an isolated number.
How to use a finger-prick kit step by step
Portable testing changed what people could do at home. Diabetes UK describes supporting Professor Anthony Turner, associated with Cranfield University in England, whose team helped launch the world's first handheld blood glucose meter by 1987. [5]
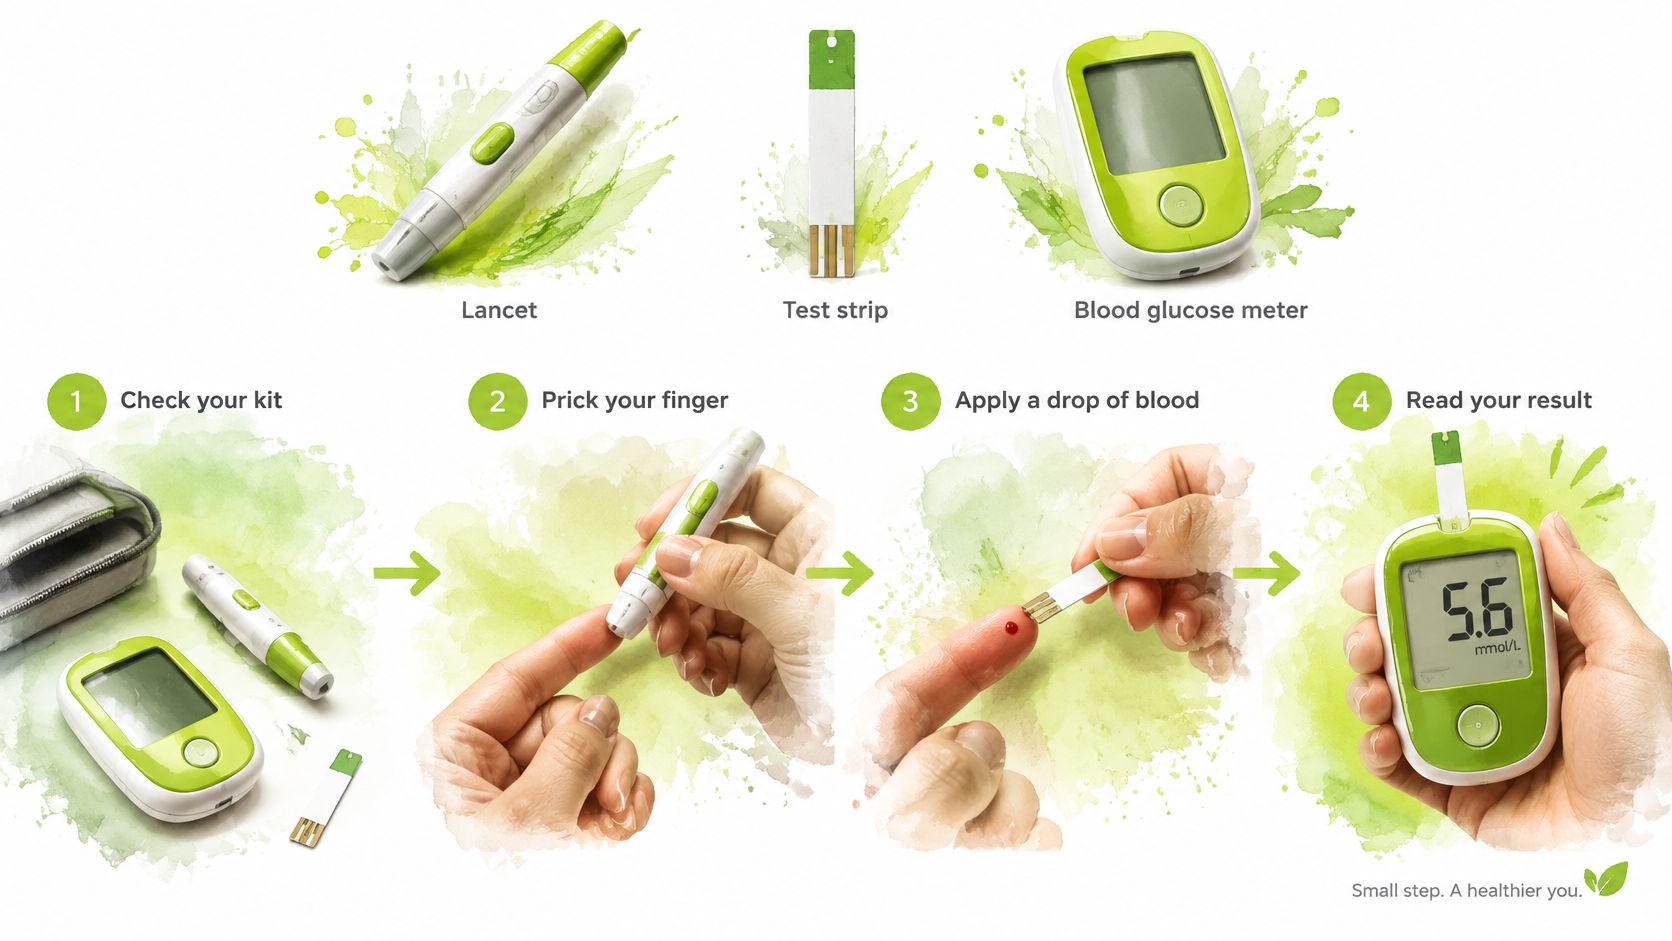
The basic tools remain familiar: a lancet to prick the skin, a test strip to receive blood and a meter to display glucose in mmol/L.
This visual gives a quick overview of the process.
Prepare before you prick
The MHRA's information for device users supports careful use, storage and checks according to the manufacturer's instructions. Clean technique matters because contamination and moisture can distort the sample. [6]
- Check the kit. Confirm that strips match the meter, remain in date and have stayed sealed in their original container.
- Wash and dry your hands. Use soap and water, then dry thoroughly. Food residue can contaminate the drop, while water can dilute it.
- Insert a strip. If your meter requires coding, match the displayed code to the strip batch using the manual's method. Some meters don't need manual coding.
- Run the required control check. When opening a new strip batch, use the manufacturer's control solution as instructed. This checks the meter-and-strip system without using blood.
Don't skip preparation because you've tested for years. Familiar routines can still drift, particularly when you're tired or rushing.
Collect and record the sample
- Prick the side of a fingertip with a fresh lancet. Use the lancing device setting you've been taught.
- Apply a full drop to the strip's sample area. Let the strip draw it in as instructed; don't assume you can add more blood after an incomplete sample.
- Keep the meter steady while it processes the sample. Check the display unit, then record the result with the time and meal details.
- Dispose of the lancet and used strip safely. Never reuse either.
Read the result alongside your symptoms and diabetes plan. Follow an agreed insulin-adjustment plan if you have one, rather than improvising a dose from an unexplained reading.
This video offers a further demonstration to use alongside your own meter's instructions.
Handle errors without guessing
If the meter displays an error, repeat with a fresh strip. If the error returns, check the manual and ask for advice instead of making repeated attempts with the same supplies.
Extreme heat, cold and humidity can affect performance. Store the meter within the maker's stated conditions, not in a hot car or damp bathroom.
Pharmacist's tip: Ask someone to watch you perform a complete check. A small technique change can be more useful than buying a different meter.
For laboratory collection rather than instant monitoring, use the separate guide to using a home blood test in the UK.
Reading your number and when to seek urgent help
Your personal diabetes plan comes first. Common home targets provide context, but age, pregnancy, frailty, treatment and the risk of low glucose can change your goals.
The NHS-linked MyHealthLondon monitoring guide lists common targets for many adults with type 2 diabetes: 4–7 mmol/L before meals, below 8.5 mmol/L two hours after meals and approximately 5–8 mmol/L at bedtime. [7]
The Barnsley diabetes testing guideline distinguishes clinical diagnosis from monitoring: fasting plasma glucose of 7.0 mmol/L or above may indicate diabetes; its guidance also identifies the high home readings shown below. [8]
The NHS HbA1c guide gives 48 mmol/mol (6.5%) or above as a result that may indicate diabetes; in someone without symptoms, confirm it with a repeat venous HbA1c within two weeks. [9]
Glucose reading ranges and when to seek advice
| Reading | Value | What it means |
|---|---|---|
| Before meals target for many adults with type 2 | 4–7 mmol/L [7] | Within the common home-monitoring range |
| Two hours after meals target | Below 8.5 mmol/L [7] | Within the common home-monitoring range |
| Bedtime target | About 5–8 mmol/L [7] | Check against your personal plan |
| On waking or before eating | Above 7 mmol/L [8] | High, so seek clinical advice |
| At least 90 minutes after food | Above 11 mmol/L [8] | High, so seek clinical advice |
| Fasting plasma glucose for diagnosis | 7.0 mmol/L or above [8] | Diabetes may be diagnosed by lab test |
| HbA1c for diagnosis | 48 mmol/mol (6.5%) or above [9] | If symptom-free, repeat with a venous test within two weeks |
A home result at a diagnostic-looking level isn't itself a diagnosis. Equally, a reassuring result shouldn't dismiss ongoing symptoms.
When to seek urgent help
Call 999 for collapse, unresponsiveness or confusion that doesn't improve after treatment. Don't give food or drink to someone who can't swallow safely.
Contact NHS 111 or your GP urgently for persistent high readings with thirst, vomiting or drowsiness. Follow your sick-day or hypo plan while arranging help, and don't delay urgent care to troubleshoot a device.
Our home test results undergo review by qualified healthcare professionals for accuracy and safety. All our home blood test kits include a FREE follow-up consultation with a prescriber.
Results are private and shared only with you. We can help forward them to your GP if you wish.
For a separate medicine question, our guide to tadalafil, diabetes and heart health isn't a guide to treating high glucose.
Next step: bring your readings, meter details and medicine list to your appointment.
When a reading looks wrong
Does this number fit how you feel? A reading that clashes with symptoms needs a pause. The cause could sit in the sample, the strips or the meter. It could also sit in your body, and that needs medical care first.
Heat, humidity, damp storage and expired strips can shift a result up or down. Dirty or wet hands can do the same. A poor batch, the wrong strip for the meter, too little blood, or use outside the stated temperature range can also give a false high, a false low, an error message or no result at all.
Result problems, likely causes and fixes
| Problem | Likely cause | What to do |
|---|---|---|
| Reading far from how you feel | Dirty or wet hands, or a damaged or expired strip | Wash and dry hands, use a fresh strip and repeat once |
| Error message or no result | Too little blood, wrong strip type or moisture on the strip | Use a full drop from a fresh site and confirm the strip matches the meter |
| Meter fails the control test | Expired strips, a poor batch or a fault | Stop using that batch and contact the supplier or clinician |
| Meter gives odd numbers in heat | Storage or use outside the temperature range | Check the manual and store the meter as the maker advises |
| Result differs from a lab test | Sampling site, calibration type or storage | Ask about venous confirmation and use only a validated sampling site |
These are possible causes. They do not prove the meter is faulty. Never assume an alarming result is only a technical error.
A shift worker finishes a sweet snack, handles the wrapper, then tests without washing. The meter shows high. The worker feels well.
Washing and drying hands, then repeating once with a fresh compatible strip, often clears this type of error. Check expiry, check storage, and run the control test where the maker requires it. Stop there. If the repeat still looks wrong, seek advice. Do not keep testing until a preferred number appears.
Medicines can affect home blood test results too. Note all medicines and supplements when you review results, and speak to a clinician. Keep taking treatment as agreed while you seek advice.
A passing control test does not prove your blood sample was sound. It does not make an unexpected result safe to ignore.
Common questions
Can a home kit diagnose diabetes? A home test can support assessment. A clinician must interpret it and arrange confirmation where needed.
Can I use another brand's strips? No. Use only strips specified for your meter. Other strips will misread or fail.
Why do my sensor and meter disagree? They measure glucose in different body fluids at different times. Follow the sensor instructions for backup finger-prick checks.
Should I change medicine after an odd reading? Follow your agreed treatment plan. Do not improvise a dose change from one unexplained result. Ask your team what to do.
What if the control test fails? Stop relying on that batch or system. Contact the supplier or your clinical team for next steps.
Can I ignore symptoms if the number looks normal? No. Symptoms lead. Seek help when symptoms are severe or persist, even with a reassuring number.
Summary
Choose a test that answers a clear clinical question. Use compatible supplies and careful sampling technique. Agree targets and actions with your diabetes team. Question results that do not fit your symptoms. Seek urgent care before spending time on device checks. Keep a useful record for clinical review. Bring readings, meter details and your medicine list.
Disclaimer: This information isn't a substitute for personal medical advice.